Requirements
- A Mac running macOS 13.0 or newer (Apple Silicon and Intel both supported — the bundled tmux is universal).
- An iPhone with iOS 16+ and the Really Remote app installed.
- Both devices on a network where they can reach each other (home Wi-Fi is the simplest case; Tailscale or any VPN works for remote access — see step 7).
1. Install Mac Relay Server
Download the latest signed and notarized .dmg from GitHub Releases:
Download MacRelayServer-0.2.54.dmg
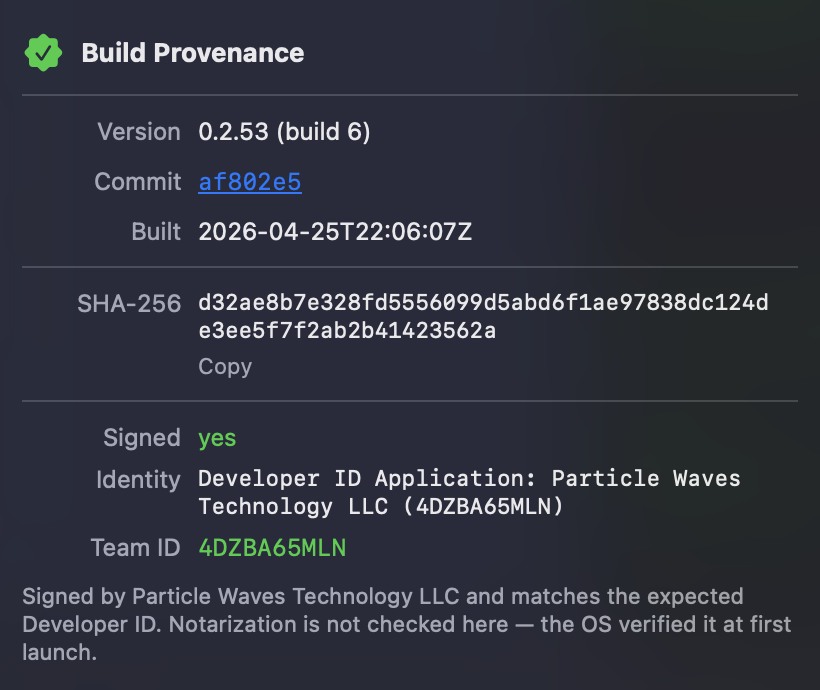
Open the DMG and drag Mac Relay Server to your Applications folder. The app is signed by Particle Waves Technology LLC (Team ID 4DZBA65MLN) and notarized by Apple, so Gatekeeper will allow it on first launch without prompting.
tmux is bundled inside the app (Contents/Resources/tmux), so the app works out of the box even on a Mac without any developer tools installed. If you already have tmux from Homebrew, the relay automatically prefers it for upstream security updates.
2. First launch
Open Mac Relay Server from your Applications folder or Spotlight. You'll see the main window with port settings, status, network info, the SESSIONS row, and a remote-snapshot pane.
Mac Relay Server
v0.2.54 · b19aa05The main window with the server running and one session created.
Click Start Server. The status indicator turns green and reads "Running on port 8765". If port 8765 is already taken on your Mac, change it to any free port before starting.
3. Verify the build (optional but worth doing once)
In the title bar, the green pill v0.2.54 · b19aa05 is your build verification handle. Click it to confirm the binary you have matches the one GitHub published.
You can also verify from Terminal:
shasum -a 256 "/Applications/Mac Relay Server.app/Contents/MacOS/ReallyRemoteApp"
codesign -dv --verbose=4 "/Applications/Mac Relay Server.app"
Compare the SHA-256 against what's listed on the GitHub Releases page.
4. Bundled tmux or system tmux?
Above the SESSIONS row, a small pill reads "via bundled tmux" or "via system tmux". Click the (i) icon for details about which binary is in use.
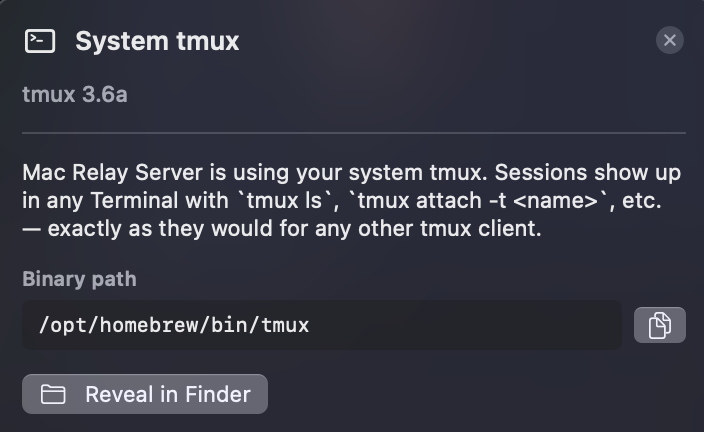
If you have Homebrew tmux installed (brew install tmux), the relay uses that. Sessions you create in the app appear in any Terminal with plain tmux ls, and vice versa.
If you don't have tmux installed, the relay uses its bundled copy. To reach the same sessions from Terminal, use the bundled binary directly:
/Applications/Mac\ Relay\ Server.app/Contents/Resources/tmux ls
Or alias it permanently in your ~/.zshrc:
alias tmux='/Applications/Mac\ Relay\ Server.app/Contents/Resources/tmux'
5. Find your Mac's address
Click Show Network. The relay lists every active interface and its IP address.
- Same Wi-Fi network — use the address next to
en0 (Wi-Fi), typically192.168.x.xor10.0.x.x. - Tailscale or another VPN — use the
utunaddress (Tailscale shows up asutunN (VPN/Tailscale): 100.x.x.x). This works from anywhere on your tailnet. - Localhost only (testing) —
127.0.0.1works from the same Mac, useful for development but not for the iPhone.
Note the address and the port (default 8765). You'll enter both in the iOS app next.
6. Connect from your iPhone
Open Really Remote on your iPhone. Enter the IP and port from the previous step in the connection bar at the top, then tap Connect.
The iOS app connected to the relay, attached to session dev.
Once connected:
- The status dot at the top of the iPhone screen turns green.
- The session selector lists every tmux session on your Mac.
- Pick a session (or create one in the Mac app's SESSIONS row), and you're driving tmux from your phone.
Try it: type a command on the iPhone, watch it appear in the Mac's REMOTE SNAPSHOT pane.
Cross-network access (Tailscale)
The setup above works on the same Wi-Fi network. To control your Mac from anywhere — cellular, a coffee shop, a hotel — you need a VPN that gives both devices a stable shared address.
Tailscale is the easiest option. It's free for personal use, runs on macOS and iOS, and gives every device a stable 100.x.x.x address that's reachable across any network.
- Install Tailscale on your Mac and sign in with Google or email.
- Install Tailscale on your iPhone and sign in with the same account.
- In Mac Relay Server, click Show Network; you'll now see a
utunN (VPN/Tailscale)entry with a100.x.x.xaddress. - Use that address in the iPhone app instead of the LAN address. It works from anywhere your iPhone has internet.
WireGuard, ZeroTier, or any other VPN also work — pick the one that gives both devices an address that can reach each other.
Troubleshooting
"Port 8765 is already in use"
Another process on your Mac is bound to the same port. Either stop it (lsof -i :8765 to find what), or change the port in the relay window before clicking Start Server.
iPhone shows "Cannot connect"
Most common causes:
- The Mac and iPhone are on different networks. Confirm both are on the same Wi-Fi, or that you're using a Tailscale/VPN address (see step 7).
- The Mac is sleeping. Wake it — the relay only runs while the Mac is awake.
- macOS firewall is blocking incoming connections. Open System Settings → Network → Firewall and allow Mac Relay Server.
- You typed the wrong IP or port. Re-check Show Network in the Mac app.
SESSIONS row is empty even though I created a session
This was a bug in v0.2.51 and v0.2.52 on macOS 26 / Apple Silicon — fixed in v0.2.53. If you're seeing it, confirm you're running v0.2.53 or later (the version pill in the title bar shows the build).
Verify pill click crashes the app
Also fixed in v0.2.53. Update if you're on an earlier build.
Need to see what the app is doing under the hood
Every app launch writes a per-launch log directory at:
~/Library/Logs/MacRelayServer/<timestamp>_pid<N>/
Inside you'll find tmux.log (every command spawned with full args, exit code, stderr), polling.log (the SESSIONS-row poll loop), session.log (create/kill events), and lifecycle.log (env dump and bundle paths). Zip the latest folder and attach it to a bug report.
Need more help?
If something here didn't work or wasn't clear:
- File an issue on the Mac Relay Server GitHub repo.
- Check the FAQ on the main page.
- Read the privacy policy.